Getting ready for the holidays can be a stressful time of the year—travelling, buying gifts, meeting with friends, drinking eggnog—but it need not be. Emily and I have been using Trello to plan our upcoming Christmas vacation to see family. Hear why it’s been great for Emily (gratuitous toddler videos included):
Lift Heavier Things By Tracking Your Progress
If you work out on a regular basis, you need to track your progress. I remember learning to track bench press with a printed Excel sheet in a high school weight lifting class. For some reason, perhaps because CrossFit has so much variety, it took me a while to get serious about tracking my workouts.
When I started CrossFit in February of 2011, I would get into a routine where I would show up for a workout, try to remember what weight I lifted the last time, and add some weight for the current session. This worked out really well when I was beginning, mainly because I was jumping up so much in weight each time as I started to get in shape.
After a while, I noticed that my rate of improvement was diminishing and even leveling off in some areas. The problem—which I only noticed in hindsight—was mainly due to my not being able to remember how far I had pushed myself in a previous workout. Starting at a computer screen at 5:30 AM, I wasn’t doing much research on previous weights before heading into the gym.
So earlier this year, I started tracking my workouts in a couple of Google Docs.
Apart from actually showing up for the workouts, tracking my workouts has been the single biggest contributor to my improvements this year.
I started two spreadsheets in Google Docs, Named WODs and Ben’s Lifts. I check them accordingly before heading to the gym. I even have them saved as favorites on my smartphone in case I need to look them up while I’m there. Here’s a screenshot of my entries for Deadlift this year:
It’s not too complicated. All you really need is the movement, date, rep scheme, and weight, but I added my 1RM, 3RM, 5RM, and a Notes fields, which turns out to be quite helpful. You notice on June 29, it had been over three months since my last 5x5 Deadlift. I was quickly able to see that I had struggled at 275 for my last 5x5 but thought I could push myself to 285. If I hadn’t been tracking my progress, I probably would have guessed based on my last 5x3 and probably would have ended up at about 265.
There are a ton of different ways to track your workouts. A lot of CrossFit blogs encourage you to post your scores to the comments (I really like this, mainly because it encourages a positive community, but it can be hard to look up old scores). Our box recently started using SocialWod to automatically track our white board. Again, I really like this for the community aspect.
Even with all of these great methods, I still recommend coming up with your own simple tracking system. It’s the best way (in addition to showing up) that I know of to help yourself improve at the gym.
Have any thoughts? I’d love to hear them in the comments below!
Building HTML Files from Markdown and using MarkdownPad
Each month, I deliver a webinar for two of our Fog Creek products, FogBugz and Kiln (speaking of, want to sign up for the webinars? Do so here: FogBugz, Kiln). To help me deliver a consistent and polished message, I’ll keep a script open in a browser window on a separate monitor. This ensures that I stay on track and mention all of the things I want to say.
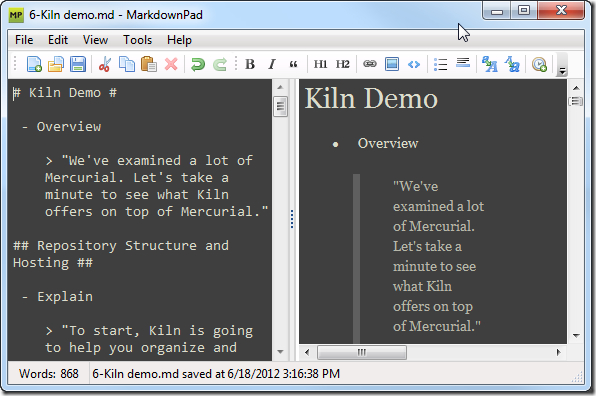
To create the outline for my scripts, I use MarkdownPad on Windows, which allows me to edit my outlines using the Markdown syntax and end up with an HTML file that’s viewable in any browser.
I really like using MarkdownPad, but one of the slower parts of my workflow involves remembering to go to File > Export HTML for each of the 7 outline files that I have. I really wanted to be able to convert my Markdown files from the command line to make this faster. Since MarkdownPad doesn’t offer this command line functionality out of the box, I decided to try to add it myself. While I was there, I added some additional features to help me out while I’m doing a live webinar. Here’s a list of features I decided to implement.
- Generate HTML using Markdown source from the command line
- Use the same CSS stylesheet and other user settings that I use in MarkdownPad when I export HTML.
- Add the ability to be able to navigate header tags using the keyboard arrow keys
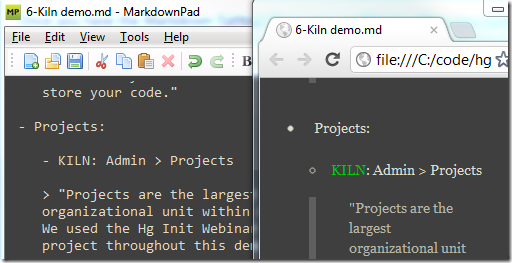
- Dynamically stylize certain key words so that they stand out. For example, if I type - KILN: in MarkdownPad, I want to be able to see - KILN: in the resulting HTML so that it stands out.
Here’s a quick screencast that shows the result of my work:
Let’s break down how I set this up.
Converting Markdown to HTML
The biggest challenge I faced, at least initially, was figuring out how to take Markdown source and convert it to HTML from the command line. I decided to try using MarkdownSharp, .NET Markdown transformation library that happens to be the same was what’s used within MarkdownPad. Since you can easily call .NET classes from PowerShell, I figured this would be a relatively simple implementation, which was indeed the case:
[sourcecode language="powershell"] PS C:\> Import-Module MarkdownSharp.dll PS C:\> $m = New-Object MarkdownSharp.Markdown PS C:\> $m.Transform("- This is a bullet point") <ul> <li>This is a bullet point</li> </ul> [/sourcecode]
The actual implementation was a bit trickier, but still relatively straightforward. I created a function in my Powershell Profile called Markdown-ToHtml. It will take either a file name or plain text and also lets you specify standard options for MarkdownSharp. Notice how I’m importing MarkdownSharp.dll, which is stored in a lib directory right within my Powershell profile. I think I built the file from source code, but feel free to grab my compiled version here (click the Download link on the right side of the page).
[sourcecode language="powershell"] Import-Module .\lib\MarkdownSharp.dll function Markdown-ToHtml($item, $AutoHyperlink = $False, $AutoNewLines = $False, $LinkEmails = $False, $EncodeProblemUrlCharacters = $False){ $mo = New-Object MarkdownSharp.MarkdownOptions $mo.AutoHyperlink = $AutoHyperlink $mo.AutoNewLines = $AutoNewLines $mo.LinkEmails = $LinkEmails $mo.EncodeProblemUrlCharacters = $EncodeProblemUrlCharacters $m = New-Object MarkdownSharp.Markdown($mo) $toTransform = "" if (($item.GetType().Name -eq "FileInfo") -or (Test-Path $item -ErrorAction SilentlyContinue)) { $toTransform = (Get-Content $item) $toTransform = [string]::join("`r`n",$toTransform) } elseif ($item.GetType().Name -eq "String") { $toTransform = $item } else { # I don't know what to do with this } return $m.Transform($toTransform) } [/sourcecode]
Once you have the Markdown-ToHtml file in your profile (or within your build script; either way is fine), the next step is to grab MarkdownPad’s settings so our generated HTML is consistent with what you see in MarkdownPad.
Find MarkdownPad’s Settings
MarkdownPad is a ClickOnce application, so it’s settings are stored in a user.config file in a seemingly random folder in the user’s AppData directory. Thankfully, we can use a little Powershell Magic to make sure we get the correct file:
[sourcecode language="powershell"] PS C:\> ls $env:APPDATA\..\Local\Apps\2.0 -r -include user.config | %{if(cat $_ | ss "MarkdownPad" -quiet){return $_;}} | select -first 1
Directory: C:\Users\benm\AppData\Local\Apps\2.0\Data\0CZN9Q11.JVM\MNOR0348.10M\mark..tion_12329825c85e214b_0001.0003_8873814a9315382c\Data\1.3.1.1
Mode LastWriteTime Length Name ---- ------------- ------ ---- -a--- 6/18/2012 3:02 PM 10492 user.config [/sourcecode]
Reading the XML file is also pretty simple:
[sourcecode language="powershell"] #Get the MarkdownPad config file $configFile = ls $env:APPDATA\..\Local\Apps\2.0 -r -include user.config | %{if(cat $_ | ss "MarkdownPad" -quiet){return $_;}} | select -first 1 #Parse the config file as XML, pulling out appropriate values [xml]$doc = Get-Content $configFile $Css = $doc.SelectSingleNode("/configuration/userSettings/MarkdownPad.Properties.Settings/setting[@name='HTML_CustomStylesheetSource']").Value $AutoHyperlink = [System.Convert]::ToBoolean($doc.SelectSingleNode("/configuration/userSettings/MarkdownPad.Properties.Settings/setting[@name='Markdown_AutoHyperlink']").Value) $AutoNewLines = [System.Convert]::ToBoolean($doc.SelectSingleNode("/configuration/userSettings/MarkdownPad.Properties.Settings/setting[@name='Markdown_AutoNewLines']").Value) $LinkEmails = $False $EncodeProblemUrlCharacters = [System.Convert]::ToBoolean($doc.SelectSingleNode("/configuration/userSettings/MarkdownPad.Properties.Settings/setting[@name='Markdown_EncodeProblemUrlCharacters']").Value) [/sourcecode]
We’ll use these settings later when we put together the complete build script.
Navigate HTML Headers Using Arrow Keys
I wanted to be able to use the arrow keys to navigate my outline files during the live webinar. I decided to include jQuery in my generated files and I ended up finding a cool library called jQuery.ScrollTo, which is included in my build script.
To wire up the ScrollTo plugin to keyboard commands, I used the following script, called scrollToArrow.js:
[sourcecode language="javascript"] (function($){ $(window).keyup(function(e){ window.ixTag = window.ixTag || 0; tagsH = $('h1,h2,h3,h4,h5'); var key = e.which | e.keyCode; if(key === 37){ // 37 is left arrow window.ixTag = window.ixTag - 1 < 0 ? 0 : window.ixTag - 1 console.log('left'); } else if(key === 39){ // 39 is right arrow window.ixTag = window.ixTag + 1 >= tagsH.length ? tagsH.length - 1 : window.ixTag + 1 console.log('right'); } $.scrollTo($(tagsH[window.ixTag]),{duration:250}); }); })(jQuery); [/sourcecode]
It’s a bit hacky, but it does the job.
Dynamically Stylize Keywords
The next challenge was to add styling to the resulting HTML page for certain keywords so that they would jump out to me during the webinar.
I had originally solved this using a PowerShell script to modify the original Markdown file, but I decided to use some javascript instead so that the original Markdown file isn’t littered with <span> tags. Here’s what the addStyles.js file looks like:
[sourcecode language="javascript"] $(document).ready(function(){ var toMatch = /^(PP|FB|PS|VS|KILN|NP|EXPLORER|THG):/i; var matches = $('p,li').filter(function(){ return $(this).html().match(toMatch); });
$(matches).each(function() { var html = $(this).html(); console.log(html); var match = html.match(toMatch)[1]; var replaceWith = html.replace(toMatch, '<span class="' + match + '">' + match + '</span>:'); //console.log(replaceWith); $(this).html(replaceWith); }); }); [/sourcecode]
Bringing It All Together into A Build Script
I use all of the above elements—putting Markdown-ToHtml in my profile, parsing the user config, the javascript files—to put together a simple build script. In short, the script will look for all Markdown files (.md) in the directory and then output the HTML to a folder called outline-html. The javascript files and the exported CSS are also placed in outline-html. Here is build.ps1:
[sourcecode language="powershell"] #Get the MarkdownPad config file $configFile = ls $env:APPDATA\..\Local\Apps\2.0 -r -include user.config | %{if(cat $_ | ss "MarkdownPad" -quiet){return $_;}} | select -first 1 #Parse the config file as XML, pulling out appropriate values [xml]$doc = Get-Content $configFile $Css = $doc.SelectSingleNode("/configuration/userSettings/MarkdownPad.Properties.Settings/setting[@name='HTML_CustomStylesheetSource']").Value $AutoHyperlink = [System.Convert]::ToBoolean($doc.SelectSingleNode("/configuration/userSettings/MarkdownPad.Properties.Settings/setting[@name='Markdown_AutoHyperlink']").Value) $AutoNewLines = [System.Convert]::ToBoolean($doc.SelectSingleNode("/configuration/userSettings/MarkdownPad.Properties.Settings/setting[@name='Markdown_AutoNewLines']").Value) $LinkEmails = $False $EncodeProblemUrlCharacters = [System.Convert]::ToBoolean($doc.SelectSingleNode("/configuration/userSettings/MarkdownPad.Properties.Settings/setting[@name='Markdown_EncodeProblemUrlCharacters']").Value)
#put the CSS in its own file $Css | out-file .\outline-html\markdownStyle.css -encoding "UTF8"
#for each Markdown file in the directory: # 1. use MarkdownSharp to convert the markdown to the HTML body # 2. build the full HTML file, adding in CSS and javascript references in the header # 3. create the file in outline-html $files = ls *.md | %{$_.Name}
$files | foreach { $htmlBody = Markdown-ToHtml $_ -AutoHyperlink $AutoHyperlink -AutoNewLines $AutoNewLines -LinkEmails $LinkEmails -EncodeProblemUrlCharacters $EncodeProblemUrlCharacters $sb = New-Object System.Text.StringBuilder [void]$sb.AppendLine('<!DOCTYPE html PUBLIC "-//W3C//DTD XHTML 1.0 Transitional//EN" "http://www.w3.org/TR/xhtml1/DTD/xhtml1-transitional.dtd">') [void]$sb.AppendLine('<html xmlns="http://www.w3.org/1999/xhtml" xml:lang="en" lang="en">') [void]$sb.AppendLine('<script src="https://ajax.googleapis.com/ajax/libs/jquery/1.7.2/jquery.min.js"></script>') [void]$sb.AppendLine('<script src="jquery.scrollTo.js"></script>') [void]$sb.AppendLine('<script src="scrollToArrows.js"></script>') [void]$sb.AppendLine('<script src="addStyles.js"></script>') [void]$sb.AppendLine('<link rel="stylesheet" type="text/css" href="markdownStyle.css">') [void]$sb.AppendLine('<head>') [void]$sb.AppendLine("<title>$_</title>") [void]$sb.AppendLine('<meta http-equiv="Content-Type" content="text/html; charset=utf-8" />') [void]$sb.AppendLine('</head>') [void]$sb.AppendLine('<body>') [void]$sb.AppendLine($htmlBody) [void]$sb.AppendLine('</body>') $htmlFileName = (($_ -split ".md")[0]) + ".html" $sb.ToString() | out-file ".\outline-html\$htmlFileName" -Encoding "UTF8" } [/sourcecode]
Once you have build.ps1, you can run it from the command line using .\build.ps1, which will generate HTML files for all markdown files in the current directory.
cURL for Powershell
OK, so the title of this post is a bit lot misleading. I haven’t implemented cURL in Powershell, but I did want a simple way to simply do an HTTP GET against a URL and download its contents. With cURL, it’s as simple as:
$ curl http://isitchristmas.com
Easy! This will download the URL as a string that can be piped into another command. In Powershell, it’s a bit more cumbersome:
PS > (New-Object net.webclient).DownloadString(
      'http://isitchristmas.com')
It will get the job done, but that’s a lot to remember just to get a string from an HTTP GET. I’ve added the following bit of code to my Powershell Profile to make this task a bit easier:
function Get-URL([string] $url){
  (New-Object net.webclient).DownloadString($url)
}
Set-Alias curl Get-URL
Those expecting the full functionality of cURL with the curl alias are going to be disappointed, but if you’re simply wanting to grab the contents of a URL, this will do the trick. Now I can get the contents of a website and pipe it into another command in Powershell, such as installing pip:
PS > curl https://raw.github.com/pypa/pip/master/contrib/get-pip.py |
     python
The Paleo Diet is Not a Fad Diet
I’ve written previously about how when I first heard about the Paleo Diet, I thought it was fairly extreme. No beans? Crazy! No dairy! Stupid! No grains? Actually, this one was already starting to make sense to me, but I was a bit surprised that for a strict Paleolithic approach, this wasn’t even allowed in moderation. Extreme!
The notion that the Paleo Diet is a fad is nothing new, and when a good friend of mine who is blogging about his own journey into weight-loss and healthy living wrote a piece called What Hasn’t Worked, I decided I’d write up a piece on why Paleo is not a fad. He’s had some great success, so even if his experience is anecdotal, he does have a firm leg to stand on when he shares what’s not working. One paragraph, though, caught my attention:
Fad diets. By the time I started sniffing around fad diets I'd already educated myself enough to just come up with something on my own. Fad dieting is, again, not something you can keep up forever so I wasn't too interested.
Now, he doesn’t specifically call out the Paleo Diet, but I had recommended it to him a while back and I know he tried it, but he later moved on to other dietary regimens. That’s fine. However, whether or not Paleo was meant to be included in the mix of fad diets, I wanted to cook up a response that hopefully explains why Paleo is certainly not a fad.
Most of the people who balk at Paleo do so because of the exclusion of certain foods. In fact, the elimination of entire groups of food because they are considered harmful is, according to a questionably-written Wikipedia entry on fad diets, one of the qualifications of being a fad diet. It’s true that a strict Paleo Diet excludes all dairy (milk, cheese, yogurt), legumes (beans, peas, peanuts), grains (bread, pasta), and – this should go without saying – processed foods.
I’m not going to go in to why these foods are excluded. If you want to read more, start with this article, and then consider reading Robb Wolf’s excellent The Paleo Solution or Loren Cordain’s The Paleo Diet.
After you remove a few food groups, what’s left?
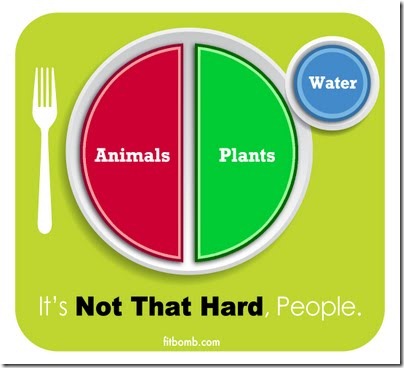
We’re left with many varieties of beast, foul, fish, vegetables, fruits, nuts, and seeds. Oh Noes! What about my Twinkies! There are no processed foods here; you’re only going to find what our bodies were designed to eat. Let’s take a closer look.
Meat
Hands-down, animal meat is the best source of dietary protein for your body. Yes, quality does matter, which is why the protein that comes from meat is orders of magnitude superior to that found in, say, a candy bar or a head of broccoli. The nutrition label for your favorite bran muffin might indicate that it contains protein, but it doesn’t say what kind of protein it is, nor does it say how useful (or destructive) that protein will be once it enters your body.
Are some forms of meat better than others? Absolutely. For example, grass-fed beef is better than grain-fed (i.e. corn-fed) beef, both in that it is leaner and has a much better ratio of Omega-3 to Omega-6 fatty acids. This should come as no surprise. Cows were made to eat grass, not grain, so when we eat animals that are living out the fullness of their genetic potential, we also benefit from a dietary perspective. The same holds for wild-caught vs. farmed (i.e. corn-fed) fish and pastured chickens vs. confined (and exclusively grain-fed) chickens.
When it comes to meat on the Paleo Diet, we want to have variety and quality to get the best sources of protein and unprocessed fat in our diet.
Fruits & Vegetables
Let’s go ahead and throw vegetables and fruits into the same category and look at them together. If you’re doing Paleo to lose weight (which works, by the way), you’re going to want to stick with mostly vegetables and minimal fruit, but from a dietary perspective, both categories offer an excellent source of carbohydrates.
I cringe every time I hear, “Oh, you’re doing a caveman diet? So that means you’re cutting out carbs,” as if pasta were the only source of dietary carbohydrates. “Yeah, but if you want to get carbs from vegetables, you have to eat a lot!” Uh-huh. You can also get your carbs from a Butterfinger and a gallon of sweet tea, but are you really getting quality carbohydrates? Not a chance.
Even at the purely nutritional level, food is a lot more than just a source of calories. Of course, you’re going to get plenty of calories from eating your fruits and veggies, but you’re also going to get lots of fiber and a wealth of micro-nutrients (e.g. vitamins & minerals). When compared to grains, even whole grains, vegetables win when it comes to nutrient content.
Nuts, Seeds, & Oils
We round out the Paleo Diet with nuts, seeds, and an wonderful assortment of oils. These provide an excellent source of fat to compliment the meat and vegetables in our diet. Dietary fat also helps trigger our sense of satiety during a meal so that we know we’re full and should stop eating.
But What About Everything Else?
What do you mean “what else”? In addition to the food choices mentioned above, what other foods do you need in your diet to get the macro-nutrients (protein, fat, & carbs) and micro-nutrients (vitamins & minerals) for healthy living? Nothing. Everything you need for a full, balanced, healthy diet is there. Dairy, grains, and legumes aren’t offering you any nutritional benefits that don’t already exist by sticking to plants and animals.
You could eat like this for the rest of your life.
Not a Diet, But a Lifestyle
The thing is, not only is the Paleo Diet not a fad diet, it’s hardly even a diet. You can eat this way for your entire life, enjoying what you eat and staying healthy. If you’re trying to lose weight, you’ll probably want to be strict with Paleo until you reach a satisfactory maintenance weight, but most folks eat Paleo 80% of the time and get 95% of the benefits. Thus, even though you probably don’t have any ice cream in the fridge while you’re eating Paleo, you don’t really have a problem with going out for an occasional frozen treat.
But, But, But …
I gave some excellent resources above to point to why certain foods are excluded in a Paleo Diet, but the truth is, if you spend all of five minutes on the internet, you can find plenty of conflicting arguments for why Paleo is wrong in one area or another. One article will talk about how a caveman ate a taco one time and so grains are really OK while another article will talk about how beans are just fine. When you don’t have a PhD in molecular biology, you can get overwhelmed pretty quickly, but you know what? Nothing you read can contradict the fact that eating Paleo foods is healthy and sustainable for your entire life.
The objections people have to Paleo have nothing to do with whether or not you can actually be healthy just eating meat, vegetables, fruit, seeds, and nuts. When people balk at Paleo, it almost always has to do with not wanting to give up certain foods. “I can’t give up my cereal” or “there’s nothing wrong with dairy” of “that diet is just a fad.” Instead of explaining the billion reasons why you’re not doing Paleo, why not just try it for 30 days and see what’s different? Start with the quick-start guide found on Robb Wolf’s website.
At the end of the day, the objections don’t really matter because the foods you’re eating with a Paleo lifestyle will make you a healthier human person. You can eat this way, with great success, for the rest of your life, and that’s why Paleo is not a fad diet.
You Have This Glow About You
An Everything-Glazed Lunch: A HoneyBaked Krispy Kreme Sandwich
Since my new job began a month ago, I’ve been trying to experiment with the World's Best Ham and try it in different food combinations. After picking up a box of Krispy Kreme doughnuts last night, I was intrigued by the fact that a Krispy Kreme doughnut is basically bread covered in a sugar glaze:
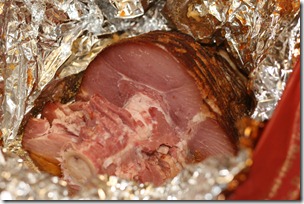
HoneyBaked Ham is basically a ham (well, not just a ham; this is the World’s Best Ham that we’re talking about here) covered in a sugar glaze (can’t you just taste the crunch? yum…)
A sandwich, to be overly generalistic, is simply two pieces of bread with a piece of meat in between. So what do you get when you take two glazed pieces of bread and put a glazed piece of meat in between? I present to you the HoneyBaked Krispy Kreme Sandwich:
To be honest, I thought that combining the World’s Best Ham with the World’s Best Doughnut (IMHO) could possibly make the World’s Best Sandwich. It turns out that there’s just a little too much sugar in this culinary concoction as it hides the natural tastiness of the ham. Perhaps this would make a nice treat at state fairs and southern weddings.
While my final verdict for the sugary sandwich is only a C+, I still enjoyed the experiment and it made for a nice high-calorie Sunday brunch.
Finding a Job the Unconventional Way
 Sometime at the end of last summer, I was sharing with my newlywed wife that I wanted to transition into a career as a software developer. With no professional background in programming and only being able to put on a resume what I’ve taught myself in Excel and Access VBA code, a little HTML, and some SQL, deciding to find a job as a developer was no small endeavor.
With the encouragement of a friend, I decided to start learning Silverlight and even blogged about my learning (the post originated at Silverenlightening.com and has been ported here). I read tons of blog posts that focused on Silverlight and software development in general. I tried reading a book on Silverlight and when I realized that Silverlight was over my head because of my lack of programming experience, I bought a book on C# and got some great practice over at ProjectEuler.net. I went to several different users groups each month that focused on Microsoft technologies. I started using new technologies at work to leverage the power and flexibility of the more advanced programming frameworks. I asked lots of questions and even provided a few answers over at StackOverflow.com, an online community where programmers can ask questions to other programmers. And I started following lots of software developers on Twitter.
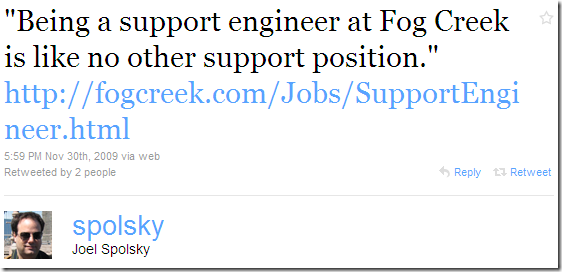
I wasn’t planning on searching for a new job until the summer of 2010. I figured that a year of practice and learning would put me in a good position to enter the market for a job as a junior software developer. That was until I saw this tweet from the CEO of Fog Creek Software announcing a job for a support engineer:
“Fog Creek? I can’t work there,” I initially thought, “they only hire the best and brightest developers on the planet!” As I read through the job description, I realized that I didn’t have to be a professional software developer to support professional software. I just had to be smart and able to solve problems. Great!
I completed my first resume that evening, which led to a phone interview with the head of technical support at Fog Creek. That interview went really well and eventually I was invited to New York for an in-person interview. Although I wasn’t offered a job, the whole interview process was wonderful and I left New York with tons of confidence that I could find a new job, even with my limited background in the field of software development.
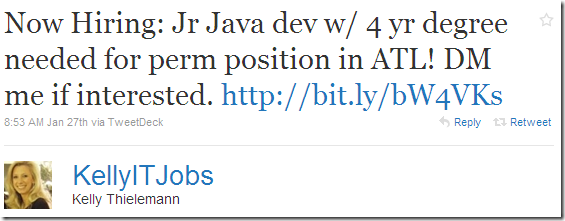
I continued to do the same things I was doing before going to New York: reading blogs, practicing programming, going to users groups, and keeping my eye on Twitter. While I usually don’t pay much attention to when people I don’t know follow me on Twitter, when Kelly Thielemann started following me on Twitter, I decided to follow her as well. I didn’t know much about her other than the fact that she was a recruiter for Matrix, a company I had heard about after going to the .NET users group, she tweeted about new jobs every now and then, and I’m pretty sure she went to my high school (though not a requirement when following someone on twitter, I’m more likely to follow someone local than someone halfway around the planet if they’re following me for marketing or sales reasons).
When I think back on it, I’m not sure what inspired me to click on the following tweet:
Sure, Java is similar to C#, but I’m by no means a “Java dev.” Maybe it was the “Jr” part of the job that made me click through (if I’m anything in the world of software development, I’m certainly junior). The job description seemed like it might be similar to the Fog Creek job, so I figured it wouldn’t hurt to send in my resume.
The senior recruiter at Matrix who reviewed my resume saw very quickly that I wasn’t a good fit for the Java job (you actually had to know Java; who knew?). However, she suggested another opportunity for a junior development position at HoneyBaked Ham Company. It sounded like a great job that would provide a way to begin a career as a software developer, so I decided to pursue it.
The phone interview went really well and that led very quickly to an in-person interview. After meeting with their lead developer and VP of IT, I felt very strongly that this job would be a great fit for me and was really hoping for an offer. While waiting a few days to hear back from Matrix after the interview, I felt like I was dating again; I thought the anxious feeling wondering if the other person was going to call wouldn’t be an issue anymore when I got married. Thankfully, I heard back from Matrix and received an offer!
After discussing the offer with my wife, I accepted the job and will start at HoneyBaked on March 1st. I’m amazed at how things lined up so that I was able to get connected with HoneyBaked. I followed blogs, networked at users groups, and kept up with industry trends on Twitter. I didn’t go to any job fairs, use jobs-centered websites, or really do any of the conventional things that people do to look for jobs. I guess that in today’s market, it doesn’t hurt to be a little unconventional.
Using Twitter to Find a Job
I've been meaning to write up a post about my success in finding a job to begin my career in software development. Matrix, the staffing/recruiting company I worked with to find the job, wrote up a post about how I used Twitter to find a job. Check it out! Using Twitter to Find a Job – A Real Life Example
Notes and Reflections From the Atlanta WordCamp
Last Wednesday, I noticed the following tweet from local Microsoft Developer Evangelist, Glen Gordon:
After I installed WordPress on my local Windows 7 machine (which went fine, except for a weird bug with Skype), I received a complimentary pass to attend the WordCamp.
While I tend to lean towards Microsoft technologies, my blog is in fact running WordPress, so I was glad to have the opportunity to attend a conference to bring me up to speed on the publishing platform. My hope was to learn about building themes, writing plug-ins, and maybe even pick up a little PHP.
The first thing I noticed about the conference was how different the demographic was from the Microsoft users groups I had attended. The average age of the attendees was quite young and there were lots of women. The feeling of community was palpable throughout the event.
Overall, I was glad I went, even though the actual sessions seemed somewhat weak in demonstrating how to actually do stuff in WordPress. The presenters of the sessions I attended were good, but they were heavy with PowerPoint slides and I would have appreciated some actual walk-throughs, and maybe even a peek at some actual code. Perhaps that’s the developer bias within me that likes to see things demonstrated.
People
I met some wonderful people throughout the day and this was by far this biggest reward on my time.
- Chef Darin Sehnert – I know Darin from a cooking class that he taught while my wife and I were on our honeymoon. His cooking classes are worth a trip to Savannah.
- Pam Leinmiller – I had lunch with Pam and learned about her background in computer science and her plans to start a blog about positive health living.
- Glen Gordon – I enjoyed meeting Glenn and discussing Microsoft at a Word Press conference :-). I really appreciated his sharing about the Microsoft WebsiteSpark program.
- Moses Ngone – I met Moses at the “Genius Bar” and he was incredibly helpful in teaching me about a lot of the “developer” stuff that goes into WordPress. He actually sat down with me and showed me some code, helping to build my confidence about diving into HTML, CSS, and PHP.
- Nathan Ketsdever – After I arrived at TAP for the after party (thanks sponsors!), I noticed that Nathan was ordering the same beer I was intending to order, the Left Hand Milk Stout (though I think we actually ended up drinking the Red Brick Ale 15th Anniversary Edition. Waiter, thanks for the mistake; it was amazing).
- Mitch Canter – I talked to Mitch briefly as he was headed out the door. His session was my favorite because he got out of PowerPoint and talked about how he develops themes. I really appreciated hearing about his approach to web design.
- Matt Thomas – I met Matt towards the end of the evening. He’s the designer behind WordPress.com. I especially enjoyed geeking out with him about typography and fonts!
Notes
- Suggested Plug-ins (most suggested by Mitch Canter)
- Code Plug-in, possibly Syntax Highlighter
- Redirection
- Twitter Tools
- Google Analyticator
- WordPress.com Stats
- WordPress Database Backup (WP-DB Backup)
- Woopra
- WP Super Cache (suggested by Mark Jaquith)
- Suggested Software (from Moses Ngone)
- Coffee Cup
- YSlow
- Web Developer Add-on or Web Developer’s Toolbox for Firefox.
- Tamper Data for Firefox (it’s like Fiddler)
- Parent/Child Themes (Ryan Imel)
Final Thoughts
I had a really wonderful time at the WordCamp and can’t wait to get started hacking away at my blog. Thanks to everyone for all of their hard word and inspiration!
Using Project Euler to Learn a Programming Language
When I first began learning to develop Silverlight applications, I noticed very quickly that I struggled a lot with C#, even those things that most programmers would consider very basic, such as:
- i += j is the same as i = i + j;
- Angle Brackets < > usually identify a generic where a type ought to be specified.
- What in the world is LINQ?
- What does static mean?
Since I was struggling so much with C#, I decided to read Illustrated C# 2008 by Daniel Solis. While it was a great introduction to the language, I still found myself hungering for a way to use C# and thus test my newfound knowledge. I started a few small projects, but I wasn’t getting excited about working on anything. I’m talking about the kind of excitement where you don’t want to leave work or go to bed at night because you’re having so much fun writing code.
Then I found Project Euler.
Project Euler (projecteuler.net) is a collection of math and programming problems that can be solved using just about any programming language. While the site is certainly tilted more towards math than programming in most cases, I find it to be an incredibly useful way to learn the nuances of a language and exercise one’s programming skills.
While some of the problems might be easily solved using math or common conventions in computer science, I like to challenge myself to learn new concepts and not simply find the answer to the question. That’s not to say that the conventional approach isn’t more efficient or correct; it often is. Rather, I’m referring to taking the time to let the problem be an opportunity to learn and try something new versus it being a mere question to be answered. Let’s walk through an example of any easy problem to see what I mean.
For example, Problem 1 states:
If we list all the natural numbers below 10 that are multiples of 3 or 5, we get 3, 5, 6 and 9. The sum of these multiples is 23.
Find the sum of all the multiples of 3 or 5 below 1000.
There are in fact several ways to approach this, both mathematically and programmatically. Going the math route, you can utilize the geometric sum, and an alternative code solution can be as simple as a simple for loop with a little bit of code for logic and addition. I decided to create a simple array of integers and then try to use LINQ to find the result. This is the code I used:
static class AddMultiples
{
    public static int PrintSum(int length)
    {
        int[] arr = new int[length];
        for (int i = 0; i < length; i++)
        {
            arr[i] = i+1;
        }
        return arr.Where(i => (i % 5 == 0) || (i % 3 == 0)).Sum();
    }
}
I didn’t have to populate an array to find the answer, but I was excited to discover how easy it was to extend the functionality of the array using LINQ. The return statement of the method has two LINQ extension methods. The first extension method, Where, restricts the data set to only those numbers evenly divisible by 3 or 5, and the second extension method, Sum, adds the results of the data provided by the Where method. Sure, all of this could have been easily set up in a simple for loop, but what’s the fun in that?
If you want to play with numbers and start learning a new programming language, I recommend spending some time at Project Euler.


